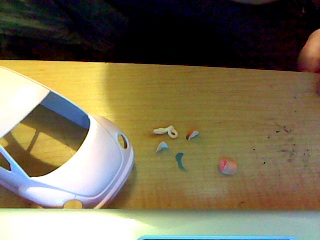
So my VW Pig model is coming along quite well now. The nose, ears and tail are attached and molded in with putty and have a couple of coat of paint brushed on over the puttied areas. It is looking more like a pig with each piece. Here's a few pics.
A blog about scale model building. It mainly focuses on automobiles, cars, trucks, racing, transports and Industrial vehicles.
Welcome to my model building blog!
This blog is dedicated to the wonderful hobby of model building. It's mostly about Automobiles, but I welcome tips and tricks from all modelers, no matter what your into.
Thursday, March 24, 2011
Tuesday, March 22, 2011
The pigs nose for my VW Pig is done!
If you read my last post you would know I'm working on a VW Bug turned into a pig. The problem was finding a suitable kids toy that had a proper sized nose I could use. Well, I had no success and decided that if I could not find one, I would have to make one. So, that's exactly what I did and it turned out great! I could not use clay or modeling putty as they are not strong enough for the grinding and sanding I was going to be subjecting it to. I was looking in my craft box and found some of that repair putty for household repairs (also known as Mighty Putty) and figured "this should be strong enough. It turns out this stuff dries rock hard and was perfect for my uses as it was sand able and did not chip very much when I was grinding it. Here are a couple of pics of this finished and partially painted piece.
Friday, March 11, 2011
My latest project, a VW Pig!
I saw this picture of a real VW Pig and it just so happened that I had a new style bug kit just sitting around, waiting for an idea like this! You might be thinking to yourself, easy enough to paint a bug pink. Sure it is, the challenge is getting the rest of the stuff for this model. I found a toy plastic pic that has perfect ears and tail, but the nose was too small. Now I am on the hunt for a perfect pig nose. Then the challenge will be shaping it to the hood and using model putty to blend it into the hood. Here is what I have so far.
Tuesday, February 15, 2011
Finally over the Flu and I learned something cool, too.
After being down and out with the Flu for almost 2 weeks I'm finally almost over it and during my "sickness" I was researching Flu shots and such (because I never got one this year) and found out something interesting that is not really related to scale models but would nevertheless make a good, informative blog post. Do you hate the idea of getting needles, like the Flu shot? Good news for you! By the next Flu season, there should be a few alternatives to the shot. The first one is a nasal spray Flu vaccine. By next year/season (in Canada at least) us Canucks will be able to get the spray instead of the needle. The second option, although it's debatable as to if and when it will be available, is the Flu patch. This is not a typical patch though, it's not trans dermal in the way you are used to thinking of patches (like nicotine patches for example) it's called a micro-needle patch. It's feels kind of like a sandpaper patch. Many little (micro) needles in a patch. Very cool stuff, that they can now make needles so fine and small that it's no more painful than rubbing sandpaper on your skin. I can live with that. Not that the Flu shot hurts much, especially if you get someone who's really experienced it can be nothing worse than a mosquito bite feeling, but for those with a real aversion to needles, these are some very cool alternatives and hopefully will be a new option by next Flu season. If your one of those people who just doesn't believe in getting the shot, or think there is some kind of "conspiracy" behind it, GET A CLUE! The shot is your first, best and sometimes only protection from viruses. Remember this quote from the movie Outbreak "Man's most dangerous and deadly enemy is only 1/1000000th of his own size" and with today's "super bugs" and "bird flu's" like H1N1 we really need to utilize whatever is available to prevent the infection and spread of these bugs. Trust me, if you have not had the Flu lately, you don't want it, it's absolute hell and it has me wishing I had got my shot this season and skipped this nightmare.
Friday, February 4, 2011
No post for a few more days, very sick.
I suppose it was inevitable that I get sick with something this season, but it couldn't be just a simple cold, or 24 hour flu. No, it had to be the full blown, knock you down and kick you while your down, flu. I feel like I've been run over by a truck. Back to bed for me.
Wednesday, January 26, 2011
Cutting open doors and trunk on a 69 GTO Judge, Part 2
As promised, here is the second installment of my 69 Judge with working doors and trunk. We left off with reassembling the doors and now it's time to make some hinges. The simple hinge we will use requires some supplies which are very cheap. Well need a length of brass tube and brass rod, available at most hobby shops and about $1.50 each. We will also need a rotary tool to cut the tube. Using a cut-off wheel on the rotary tool, cut a small length of brass tube about a 1/4 inch or less. Now cut a piece of rod about 2 1/2 inches and slide the brass tube onto the middle of the rod and bend each end of the rod around the tube creating a sort of rectangle shape. Here's a pic.
Now we want to bend the two end downward to create a sort of right angle triangle with the ends.
Some more pics.
For the final bends, we want to make the ends of the rod to finish straight not angled down. What your left with should look like a little pyramid/triangle that can sit on a flat surface. More pics.
All that remains is to cut 2 more 1/4 inch lengths of tube to put inside the door, for this end of the hinge to fit into. Mount/glue this bent rod part of the hinge inside the gap in the body in front of the door. Glue it on the body side of the front corner panel, not the interior side or it won't work. The reason for this kind of hinge is so that when the doors open freely, the hinge allows the door to open without grinding or binding on the door edges and chipping the paint or worse because of the bent design and the fact that the rods can slide in and out of the the tubes. Again, during this process, door and hinge fitment is important to check and adjust often and if you need to grind or cut away some material to do so, then do so. Some re bending of the of the rod may also be needed to get the doors flush. I had to grind away quite a bit of plastic on the inside of the doors to get them to fit right and tweak the rods a little too. It should basically look like this when it's in there.
That's it, do the same kind of hinge for the trunk and you ready to decal, detail and clear coat the model (with the doors and trunk on). Mask or cover your windows to keep the paint out of the interior. Then all that remains is to build the rest of the model (engine, undercarriage, wheels etc.) Which is what I have to do now. Have fun!
Now we want to bend the two end downward to create a sort of right angle triangle with the ends.
Some more pics.
For the final bends, we want to make the ends of the rod to finish straight not angled down. What your left with should look like a little pyramid/triangle that can sit on a flat surface. More pics.
All that remains is to cut 2 more 1/4 inch lengths of tube to put inside the door, for this end of the hinge to fit into. Mount/glue this bent rod part of the hinge inside the gap in the body in front of the door. Glue it on the body side of the front corner panel, not the interior side or it won't work. The reason for this kind of hinge is so that when the doors open freely, the hinge allows the door to open without grinding or binding on the door edges and chipping the paint or worse because of the bent design and the fact that the rods can slide in and out of the the tubes. Again, during this process, door and hinge fitment is important to check and adjust often and if you need to grind or cut away some material to do so, then do so. Some re bending of the of the rod may also be needed to get the doors flush. I had to grind away quite a bit of plastic on the inside of the doors to get them to fit right and tweak the rods a little too. It should basically look like this when it's in there.
That's it, do the same kind of hinge for the trunk and you ready to decal, detail and clear coat the model (with the doors and trunk on). Mask or cover your windows to keep the paint out of the interior. Then all that remains is to build the rest of the model (engine, undercarriage, wheels etc.) Which is what I have to do now. Have fun!
Monday, January 24, 2011
Most advanced project yet, cutting open doors and trunk on a '69 Judge.
So I decided that I wanted to take on a challenging modeling project. Taking a normal 1969 GTO Judge kit and cutting open the doors and trunk and putting working hinges on them to have a model with working doors and trunk. The good news is, I did it. The bad news, it's not as easy as I thought it would be, but that is the point of a challenge isn't it? So here's a tutorial with pictures on how to do it. First thing you need to know is building this model is going to require some supplies: 5 min. Epoxy. An old No.11 hobby blade with an intact unbroken tip. masking tape and model putty (I use Tamiya Putty, Basic Type because it does not shrink, it's very light and mold able and it grabs onto surfaces and sticks well) Why no hobby saw? Because we are not going to saw the doors and trunk open, it removes too much material and the blades bind and break while sawing, it also takes FOREVER! That's why we need an old No.11 hobby blade. We are going to use the back of the blade tip to repeatedly score along the door and trunk lines, until we cut right through them. First off though your going to want to paint and assemble the model's interior, paint the chassis (do not assemble undercarriage yet) and do not paint the body exterior (interior: yes). The reason for this is the model is going to be built sort of in reverse of what you might be used to. Once painted, your going to want to glue the interior to the chassis and the body to the chassis using 5 min. Epoxy. The reason for this is if you tried to cut open the doors on the body you would be left with a body that is very weak in the middle and could/will break. If the model is already assembled, then once the doors are cut open and removed, the body will remain rigid because the chassis is attached to it. See why we painted the interior first? Once it's assembled you won't be able get a brush in there to detail anything. Here are some pics of what's been covered so far. Note, the model in these pics is an unpainted extra Judge I had sitting around in case I messed this one up.
My lines are on the outside, but you get the idea, glue the inside edges. Once everything is glued let it sit overnight. 5 min Epoxy does not dry in 5 min. it sets in 5 min, but takes over 12 hours to completely dry.
Now that the glue is solid, your ready to begin cutting. First, we want to tape the blade, except the tip. Your finger is going to be pressing down on the sharp side of the blade for pressure because we will be using the back side of the blade, so we want a cushion between finger and blade so as not to inflict a nasty cut on ourselves. Next, we want to score along the door lines with the back tip of the blade many times. Always score down the same groove. Start with the door sides going from bottom corner to top edge of door. Once that's done, score along the bottom of the door from the corners toward the middle. The reason for these blade movements/directions is to minimize the chances of your blade jumping out of the groove and putting a nasty gouge across the body. This way, if the blade jumps, it will likely land back in the groove and harm nothing. The easiest way to remember this is always be scoring AWAY from a corner, not into it. For the last few strokes though, it really doesn't matter though as the likelihood of the blade jumping, when it's that deep into a groove is minimal. Here's a few more pics.
So, now your doors are off (trunk is much easier) but now your left with the inside door panels to deal with, what now? Same deal, using your newly opened door edges as a guide, repeat the scoring procedure until the inside panel is off. Now you have 2 halves of a door, this is where the fun begins. We are going to use these halves to make the new door. The easiest way to do this is glue the top edges of the door halves together and stick a pen or something in between the halves to hold the halves open while it dries. After it's dry, we need to fill in the back and bottom edges of the door. Do not fill in the front edge of the door as we need this open later for hinges. Once the filler is dry, sand and refill where necessary and sand again until you have nice smooth, flush edges. Also fill in the gap behind the doors with putty and sand, but don't fill in front of the door (body side) again, hinges. Check your door fitment OFTEN during this process. Paint the dry putty to match your colors and now it's starting to look like the real thing. Here's some more pics.
That's all for now. All this is going to take you some time and this blog post is getting really long, so I will continue this in a second post. Next post will be how to make a simple hinge and paint this beast!
My lines are on the outside, but you get the idea, glue the inside edges. Once everything is glued let it sit overnight. 5 min Epoxy does not dry in 5 min. it sets in 5 min, but takes over 12 hours to completely dry.
Now that the glue is solid, your ready to begin cutting. First, we want to tape the blade, except the tip. Your finger is going to be pressing down on the sharp side of the blade for pressure because we will be using the back side of the blade, so we want a cushion between finger and blade so as not to inflict a nasty cut on ourselves. Next, we want to score along the door lines with the back tip of the blade many times. Always score down the same groove. Start with the door sides going from bottom corner to top edge of door. Once that's done, score along the bottom of the door from the corners toward the middle. The reason for these blade movements/directions is to minimize the chances of your blade jumping out of the groove and putting a nasty gouge across the body. This way, if the blade jumps, it will likely land back in the groove and harm nothing. The easiest way to remember this is always be scoring AWAY from a corner, not into it. For the last few strokes though, it really doesn't matter though as the likelihood of the blade jumping, when it's that deep into a groove is minimal. Here's a few more pics.
So, now your doors are off (trunk is much easier) but now your left with the inside door panels to deal with, what now? Same deal, using your newly opened door edges as a guide, repeat the scoring procedure until the inside panel is off. Now you have 2 halves of a door, this is where the fun begins. We are going to use these halves to make the new door. The easiest way to do this is glue the top edges of the door halves together and stick a pen or something in between the halves to hold the halves open while it dries. After it's dry, we need to fill in the back and bottom edges of the door. Do not fill in the front edge of the door as we need this open later for hinges. Once the filler is dry, sand and refill where necessary and sand again until you have nice smooth, flush edges. Also fill in the gap behind the doors with putty and sand, but don't fill in front of the door (body side) again, hinges. Check your door fitment OFTEN during this process. Paint the dry putty to match your colors and now it's starting to look like the real thing. Here's some more pics.
That's all for now. All this is going to take you some time and this blog post is getting really long, so I will continue this in a second post. Next post will be how to make a simple hinge and paint this beast!
Subscribe to:
Posts (Atom)